Today we are going to do easy things. We are going to install a Linux operative system! I know that many of you have been delaying/procrastinating this step for years, saying... "One of these days I'll have to see what that is..." Well, finally this day has arrived. If you are working with bioinformatics data, you probably have already realized that the Unix environment is the base for most formats and programs.
I hope you like this ~short tutorial. It is intended for all kinds of users who need it, with the hope that you start seeing the Linux system closer, and not an only-for-bioinformatics-geeks abstraction.
I also write this article with the idea of eventually adding more tutorials about bioinformatics data analysis. Always seeking for a human readable format (-h).
In this post we are going to follow a few easy steps that will result in a perfectly working Linux distribution within a "virtual" environment. In such a way, you can test it comfortably in your usual environment (Windows, Mac, or Linux).
1. Ingredients:
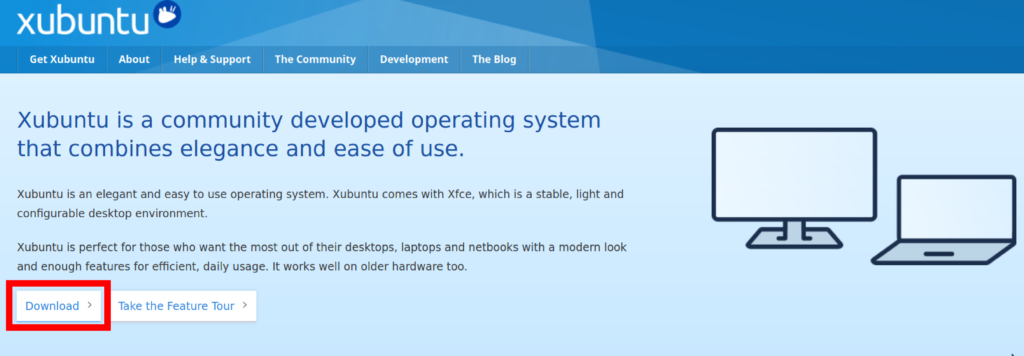
1.1. Obtaining a new distribution: for example Xubuntu from http://xubuntu.org
By clicking on Download we go to a mirror (pick whichever) from where we can select the most updated version of our Linux distribution, for example: xubuntu-18.04.3-desktop-amd64.iso.
This name tells us that:
- The distro is "Xubuntu",
- The version 18.04.3-desktop (desktop distribution),
- For 64 bits processors (newest computers are usually equipped with 64 bits processors).
We are downloading a file of a size of about 2 Giga Bytes, so keep calm, and happy downloading.
This version is the LTS (Long Time Supported) number 18.04. This means that it is supported for at least 3 years (from April, 2018). After this period we would need to update the system. The same system will remind us when an automatic update is available.
1.2. Obtaining "Oracle VirtualBox"
As soon as we have our Xubuntu file we are ready to install the program which will allow us to create a virtual computer (the guest) running within our real computer (the host). We need to install one of the virtualization systems such as Oracle VirtualBox from: www.virtualbox.org. This program is of free use under GNU General Public License (GPL) version 2.
Thus, we now have all the needed ingredients.
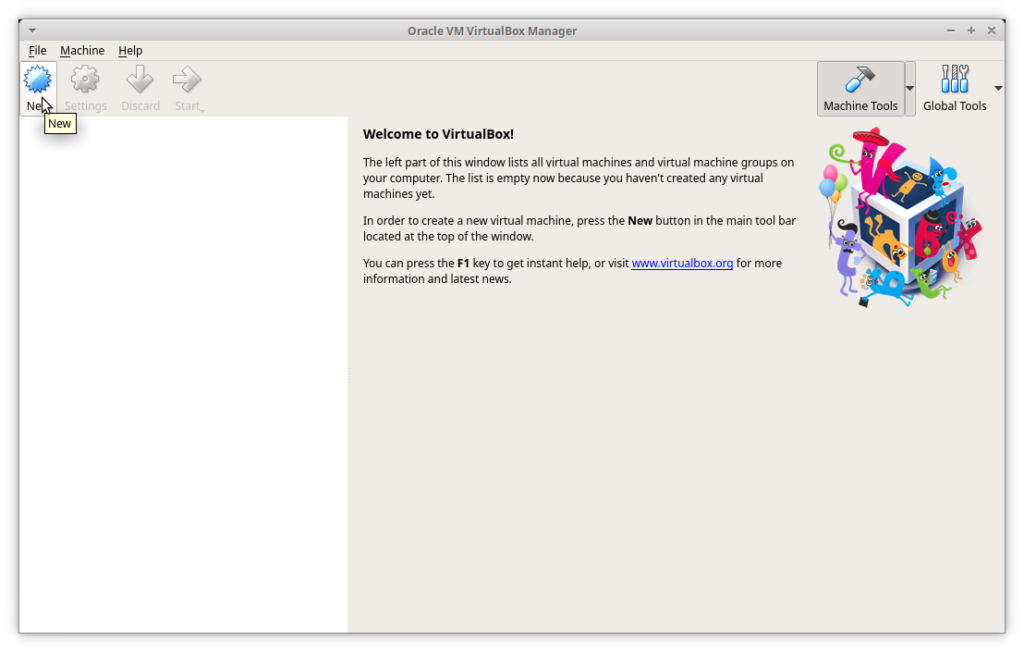
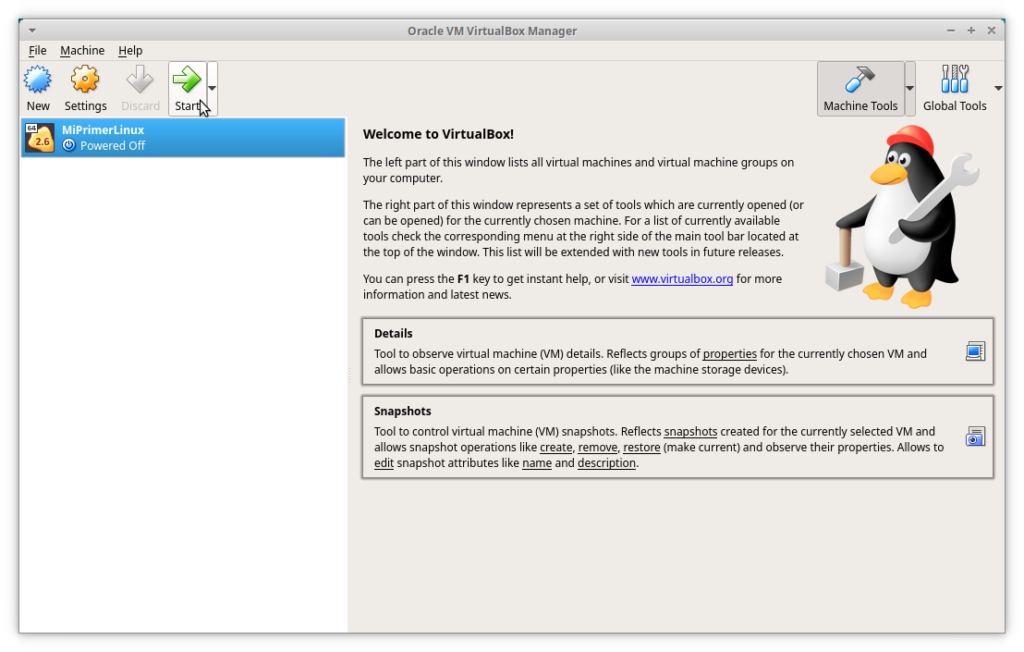
After we install the program VirtualBox by following the typical installation instructions for Windows, Mac or Linux, we can start it by using the menu as usual. If everything is installed correctly we should see a window similar to this one:
Thus, we now have all the needed ingredients.
2. The virtual computer
At this point we are ready to create our first virtual computer, it sounds strange, but it is easy. At the end of the day it will only be another big file in our computer, just like opening a digital photo; whereas you do not have the printed paper but it is there on your screen.
2.1. A new machine
Now, try to follow this easy list of steps with the help of the images. Open the VirtualBox program and click on the "New" button. This will open a new window where we can start configuring our first virtual machine (here in after VM) defining:
- The name of the machine: your choice (e.g. MyFirstLinux);
- The type of system: "Linux" (as you can see, several other options are supported);
- The Version: we have to search for Ubuntu (64bit). WARNING!!: If only the 32 bits option appears, it means that we have to properly set up the BIOS first, enabling the virtualization as follows. If you are able to select the 64 bits option, then skip to step 2.3.
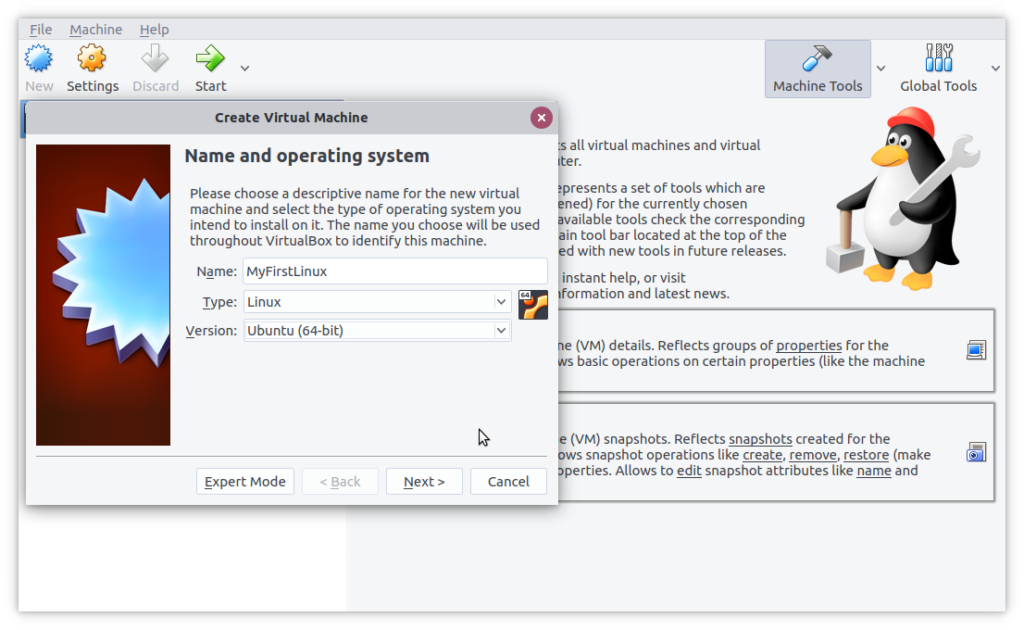
Click "Next".
2.2. Enabling the virtualization (only if needed, see previous step)
If the virtualization is not enabled you will only be able to install 32 bits operative systems, loosing the power of 64 bits machines.
Probably not everybody is aware of the existence of the "BIOS" (Basic Input/Output System). The BIOS is a software included in our computer which runs BEFORE any Windows, Mac or Linux system starts. But, what on earth are we talking about? You may have observed that when the computer starts (the real, physical one), some quick message appears, for example: "Press F2 to access the BIOS" and, in general it is so fast that we have no time to read it completely or understand it. Depending on the brand and model of you computer, the way to access the BIOS can change, so to enter the BIOS in yours, it is easier if you just ask the Internet: "How can I access the BIOS of my computer?" indicating the model of your computer.
In summary: you have to enter the BIOS immediately after turning on the computer (the only instant when you can access it). The most common keys are F1, F2, F12, ESC, etc.
After entering the BIOS (a very strange environment) search for "Advanced BIOS Features" (or something similar) and search for Virtualization Technology or VT-X and enable it (you should see "ENABLED". Then you can exit the BIOS using the option SAVE and EXIT. DO NOT TOUCH ANY OTHER PARAMETER!!! If you have any doubt, it is better to ask for help because if you change something else in the BIOS, the computer could not start properly.
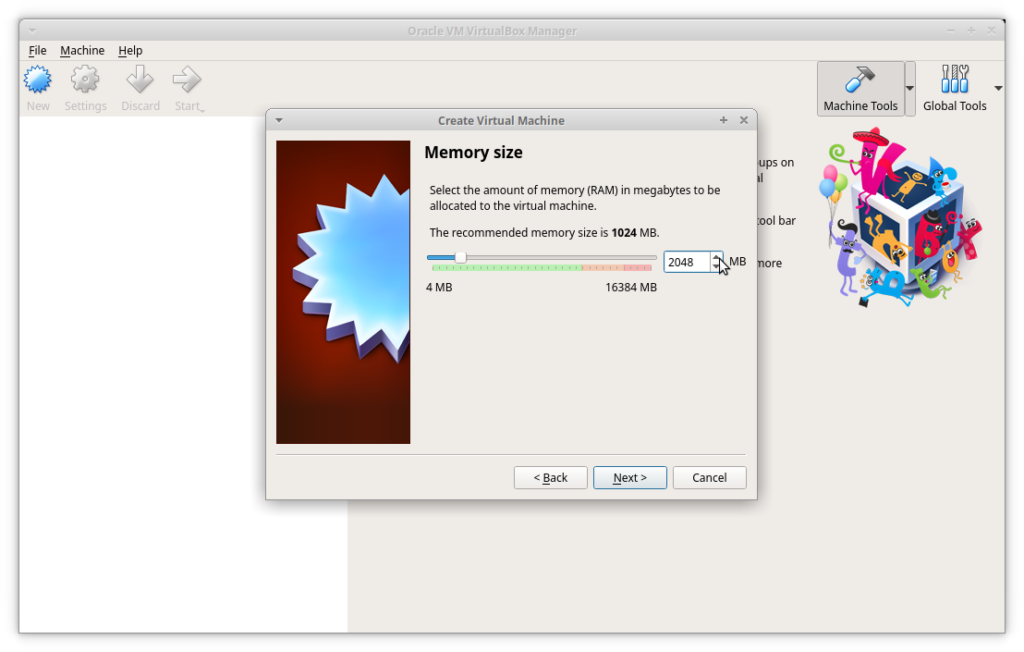
2.3. Setting the RAM memory
This is where we define how much RAM (Random Access Memory) we want to assign to our VM. This amount will enter in competition with the host system's RAM so we cannot exceed the green bar. For example, we can set it at 2048 Mega Bytes (about 2 Giga Bytes). Take into account that the computer I am currently using has 16GB. Your computer may not have as much, so just focus on not going over the green line, and you should not face any problem.
This memory is the one used to execute all our programs. It has nothing in common with the space on the disk were we permanently store our files (next step). Sometimes people say "I deleted a lot of files but the computer is still slow...", now you know that this sentence makes no sense.
Click "Next" and go on.
2.4. Creating a virtual Hard Disk
Let's go on by adding new pieces to our VM. Now it is the turn of the Hard Disk. Mainly we assume the default parameters.
TAAAADAAAAAAA
We have our virtual computer
(still without an operative system).
It is just as if you are coming out of your virtual computer shop, whit your virtual computer in your virtual box.
3. Installing the operative system
Right now, our virtual CD reader is empty, so we have to insert our CD containing the Linux operative system (the one we downloaded, point 1.1). Then, we can start the computer (virtually speaking).
So how do we do it? We have to virtually put our virtual CD in our virtual CD reader.
3.1. Inserting the Xubuntu CD in the CD reader
We can configure our disk unit by entering the "Preferences" of our SELECTED VM. Right now we have just the one, probably called "MyFirtsLinux" (we can host much more than one).
- Click on "Settings": a new window opens with all the parameters we can change.
- Click on "Storage": this will open a new window with a CD icon labeled as "empty".
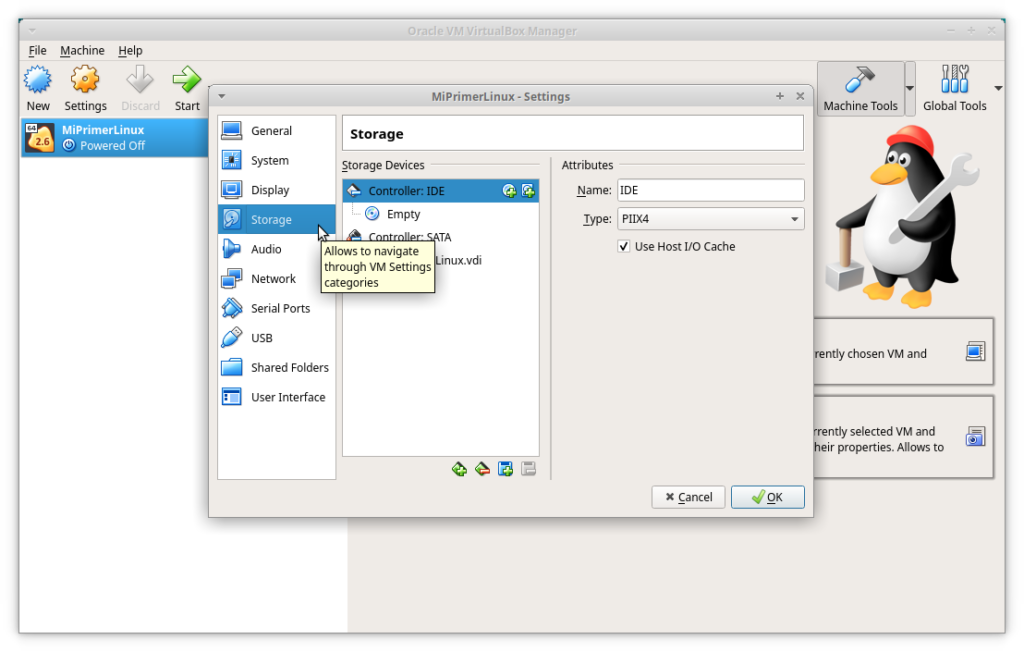
- Click on the CD icon: we have another CD icon on the right (follow the mouse arrow in the figure).
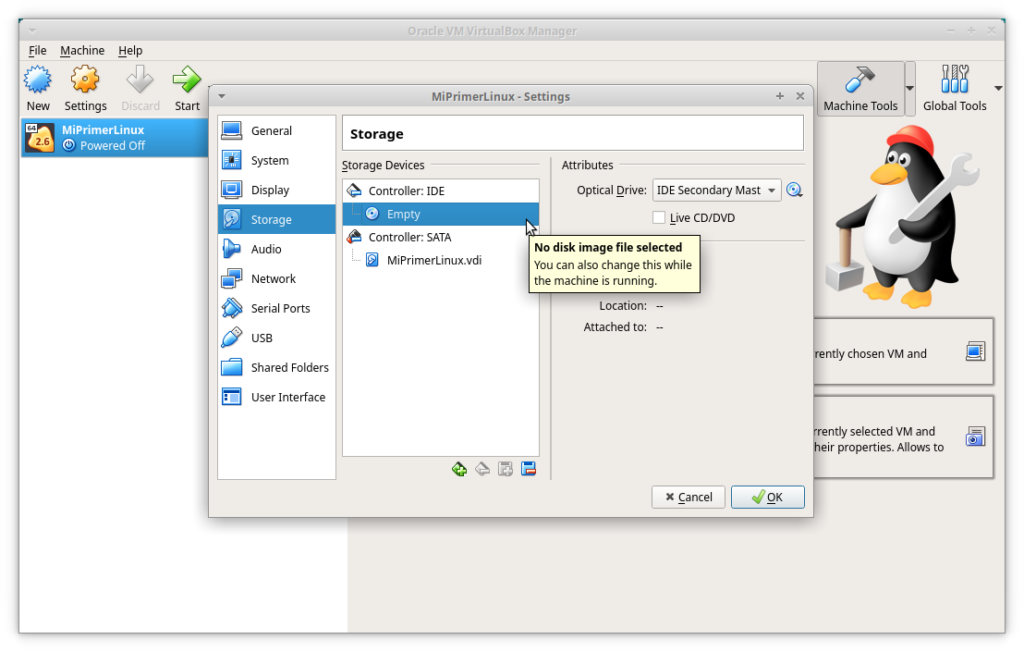
- This bring us to a window where we can choose the "File containing the system" which is our file "xubuntu-18.04.3-desktop-amd64.iso" (step 1.1).
- Navigate your hard disk until you find it, select it, and press "open".
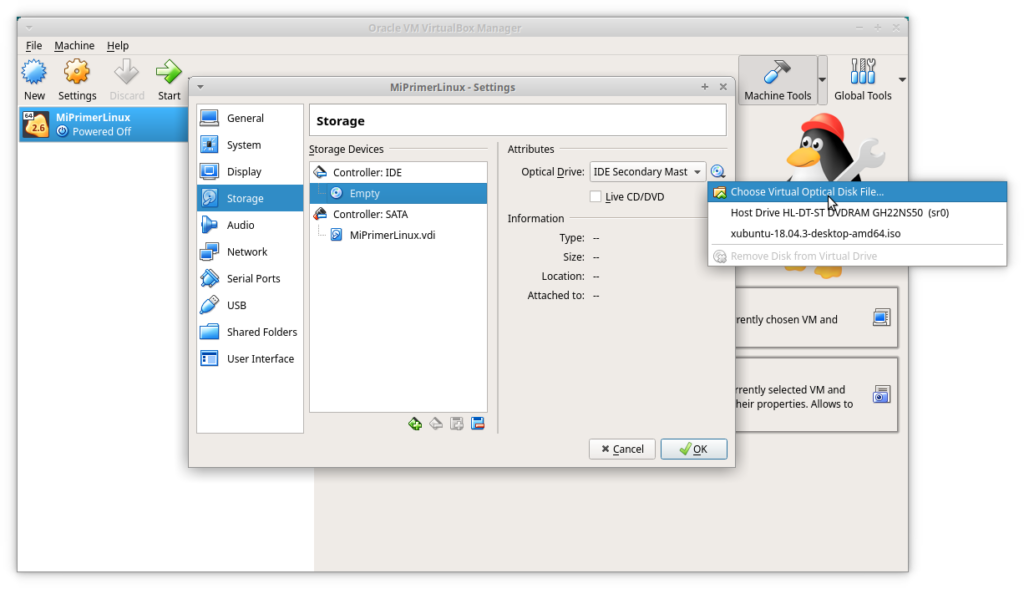
- Finally we accept all changes clicking on "OK".

Everything comes back to the beginning.
3.2. Installing Linux
We are now ready to start the VM. In this first run it will read the system from the virtual CD and it will guide us through the whole installation process. Click on "Start" !!
3.3. Ready to start our Virtual Machine
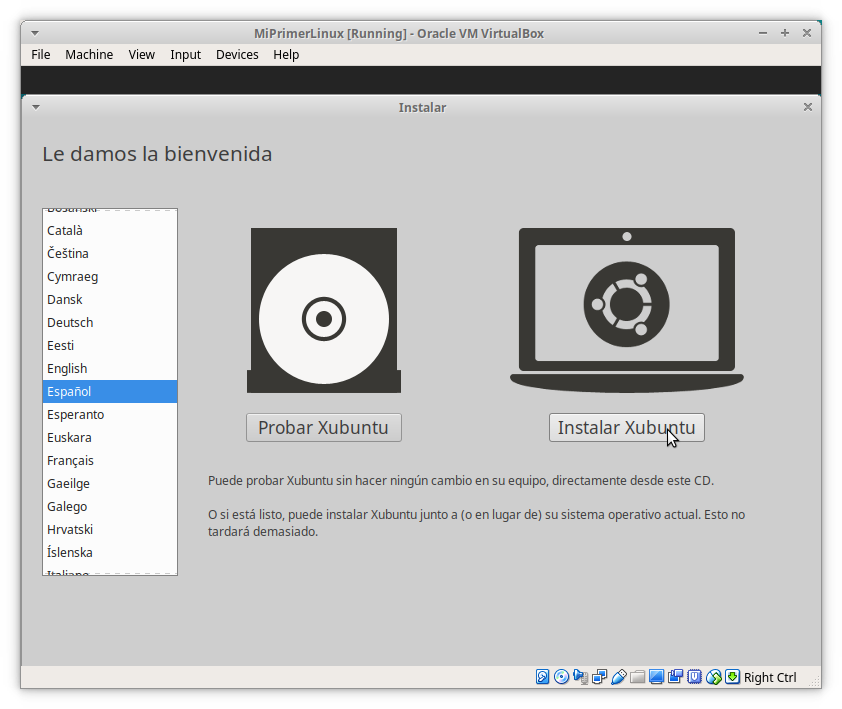
After "Start" Xubuntu begins to breath and will bring us to a window where we are asked for:
- The installation language.
- If we want just to try the system ("Try Xubuntu") or to fully install it ("Install Xubuntu").
With enthusiasm we go for "Install"
NB: Several messages appear in form of balloons. At this point we can ignore or close them by clicking on X.
Install Xubuntu
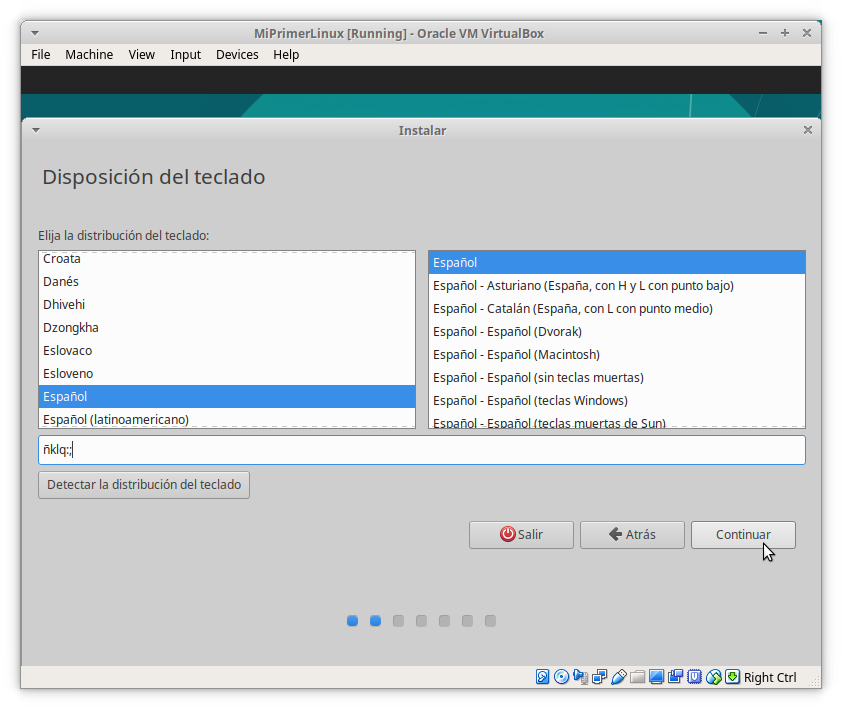
3.4. Going on with the system configuration
The installation process will go on by asking for the kind of keyboard we use. Here we have to choose the most similar to our keyboard, although the system will try to guess the actual one we have. There is a box where you can test type and see if all keys are in the correct place.
Whenever you are satisfied with the choice click on "Continue".
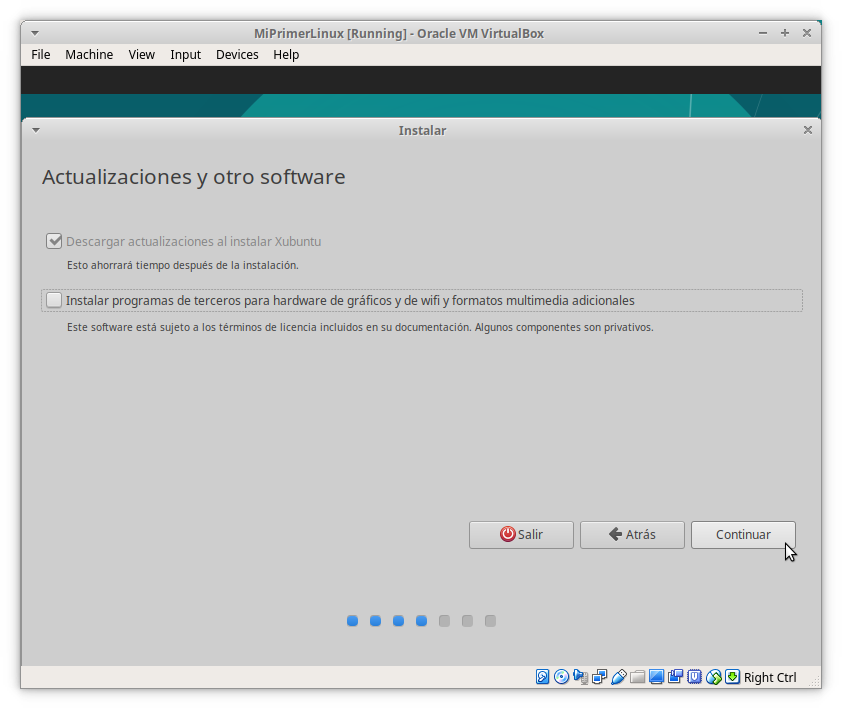
3.5. Update
All operative systems need constant updates. At this moment the installer will ask if we want to update the system while installing. We can leave the configuration as is and click on Continue. The system will periodically ask us if we want to update it.
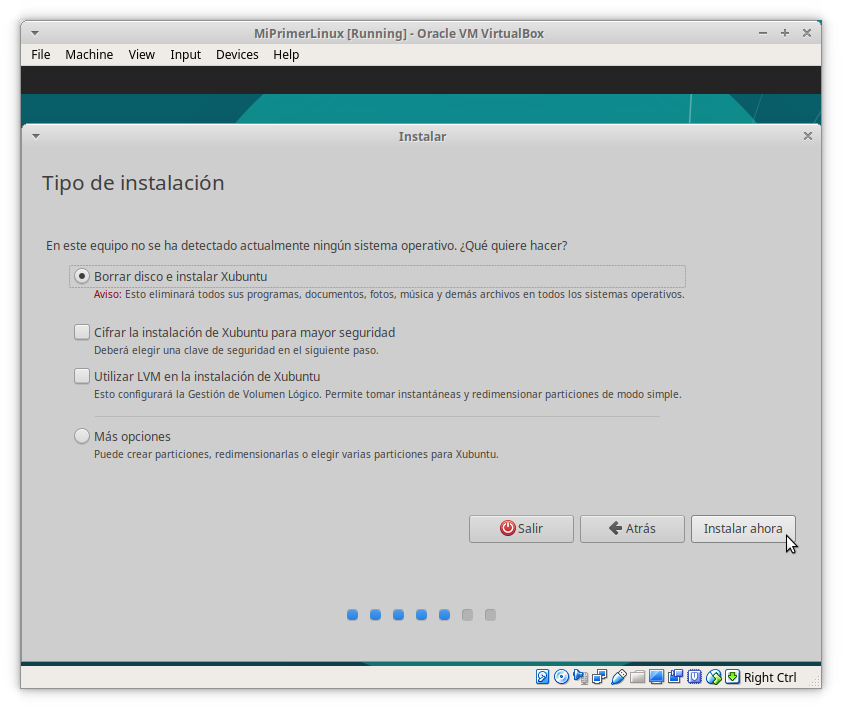
3.6. The kind of disk installation
This is a critical point. We are going to define where we want to install our operative system. The installer is going to ask "Do you want to erase the disk and install Xubuntu?". YES, this will be our choice for the virtual environment where we are working. Remember that we created a virtual disk of 10 GB (point 2.4).
WARNING: Very important!! We are working in a virtual environment!! If we were installing Xubuntu directly in our PC, at this moment we would be erasing the real Hard Disk deleting all files from the original system (Windows/MAC). Fortunately we are within a VirtualBox working with a virtual disk (just a big file). In the future, when you will feel ready to make the big commitment, you can do it on your real disk leaving Linux as your main operative system.
So, leave everything as is by default and click on "Install now".
The system will ask if we are really sure about it, and yes we are.... Continue.
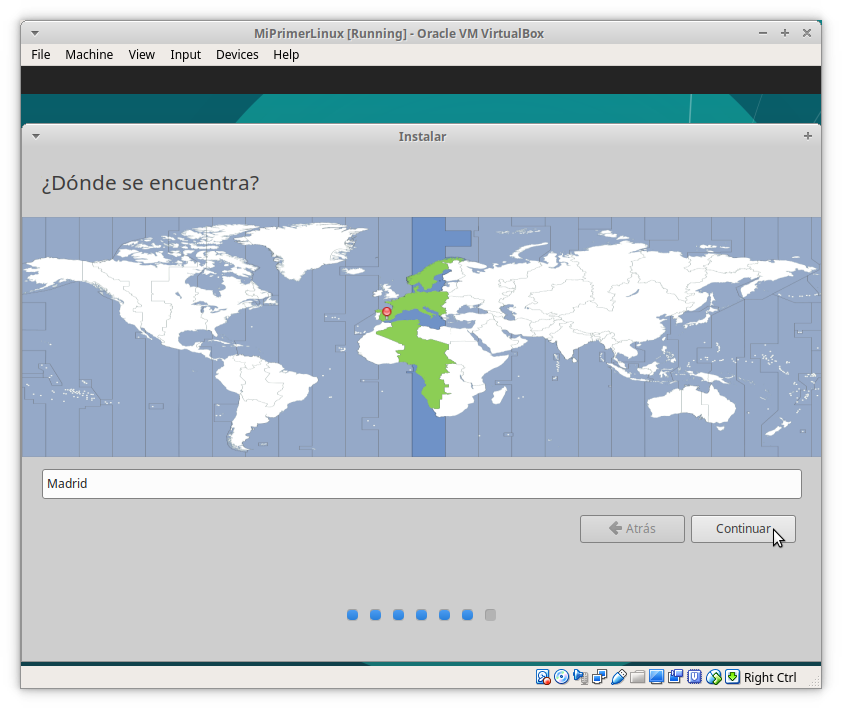
3.7. Where am I?
While the installation procedure goes on copying all the needed files, the system is asking about our location and time zone, choose it if it is not properly suggested and Continue;
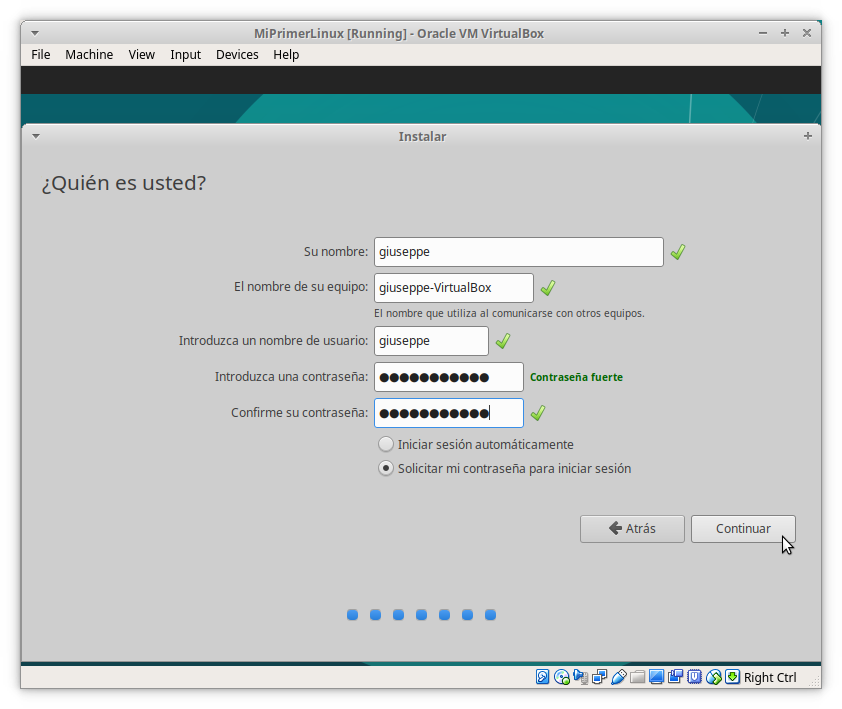
3.8 Who am I?
This step is also very important. Here we define our first user (ourselves) and the password asked to enter the system. Although I keep saying that we are in a virtual environment, it will be really connected to the Internet, thus, exposed to all its dangers. We do need to protect our access as usual with a heavy-robust password.
A good password has at least 8 characters (the more, the better), mixing lower and capital letters. If we add numbers and/or some special characters, it will be harder to crack our system.
Take into account that this consideration is valid whenever you are asked for a password.
A good password could be, for example: "SDFgjsdfg843FSDGvhasd7msdhgfds76".
A bad one: "user123".
It is true that we do not have to become paranoid, but it is good to be cautious.
The system is asking for:
- A name (a general one).
- The name of the computer, guessed automatically from your name, but we can change it (if we want).
- The user name again automatically guessed from our name. This can be also changed according to our needs. This will be our name needed to access the system (do not forget it).
- The password (the system will inform us about its strength).
- Double check the password.
- If we want to start the session automatically or if we want to be asked for password. Leave the second default option which is far safer than leaving the system open.
Then Continue.
Relax and wait for the final message reporting the end of the installation.
"Restart now"…
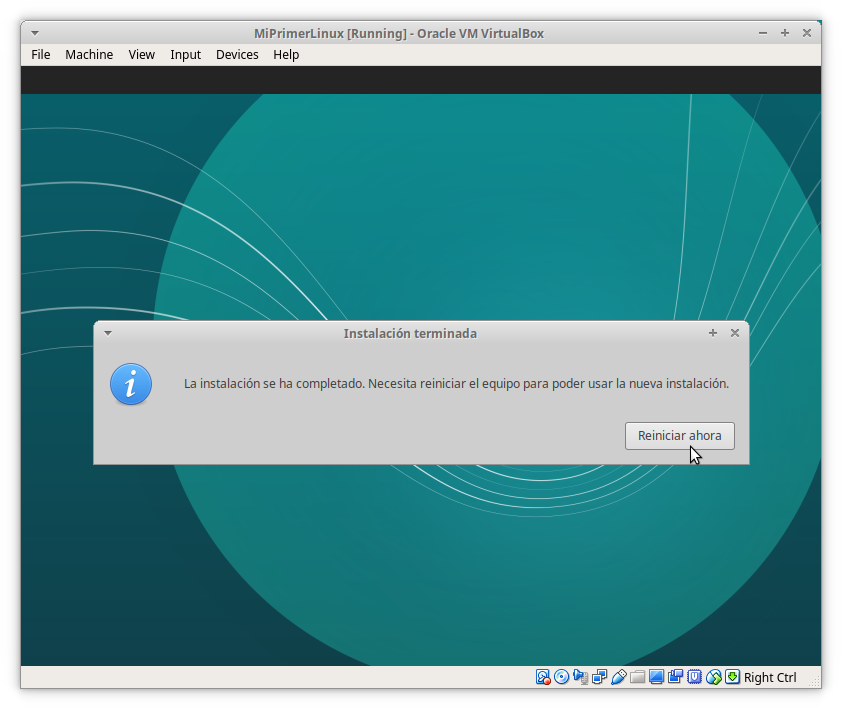
The installer will virtually eject the CD (or if something went wrong, we are going to start again from the begin) and will ask you to press Enter. You should double check that the CD icon on the bottom of the VirtualBox windows is gray (means empty).
Press Enter, and wait for the magic.
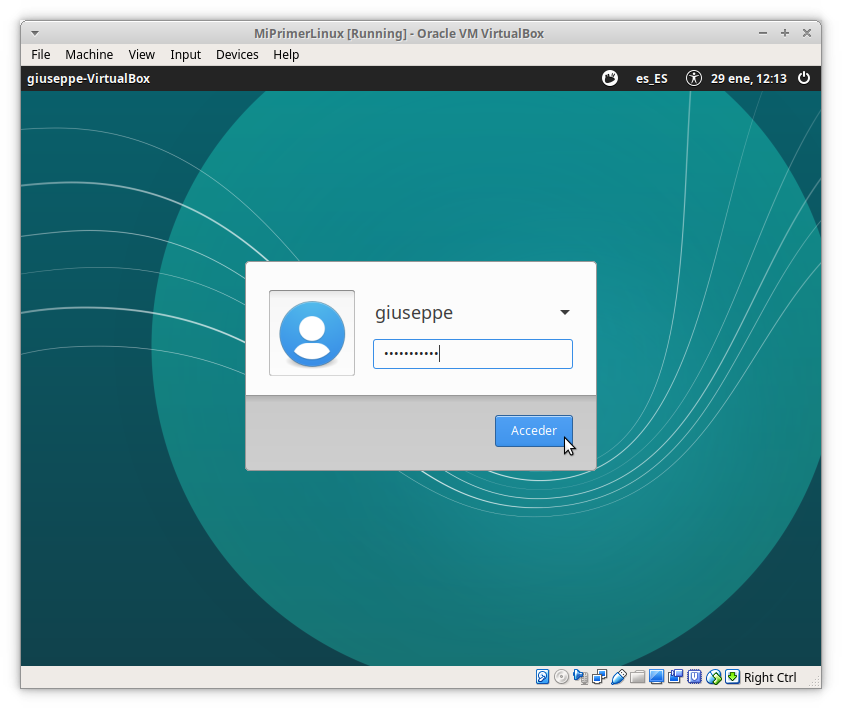
4. Login
In a few seconds we will see the access screen with our user name by default asking for the password.
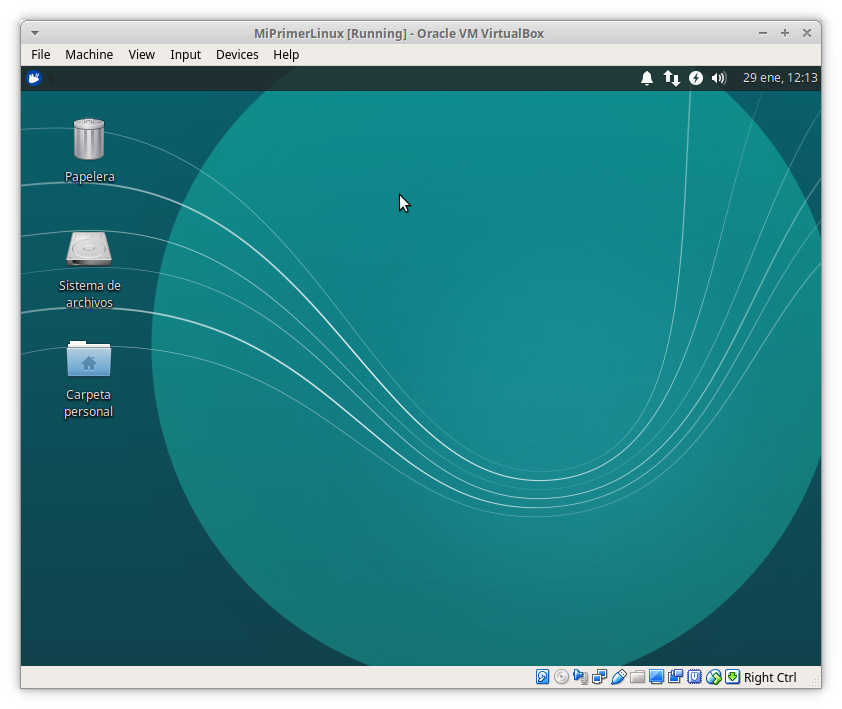
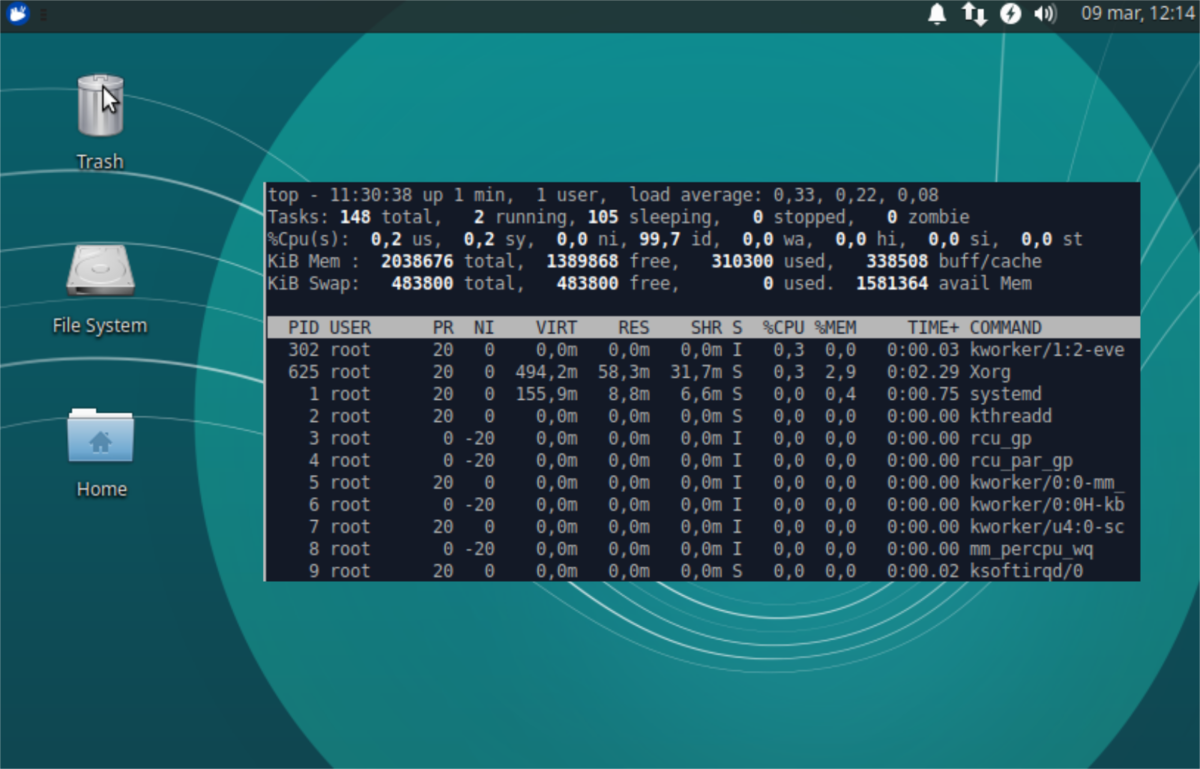
Now you are in your new and sparkling Linux system. You can start using it immediately and start becoming confident with the graphical user interface. Do not be scared about breaking anything, in the end you are in a virtual environment and no real damage can be done to your computer.
I hope you enjoyed this article and really hope that some intrepid reader arrived to the end of the procedure.
Happy Linux to everybody.
PD: If you have comments or questions, drop me an e-mail using the contact page on top.